
How to Make Ready-Made Curtains Look Custom
No Sewing Required!
We recently finished our guest bedroom a makeover, which I am so excited to share with you soon! We gave the walls and ceiling a fresh coat of paint and replaced the old, wobbly ceiling fan with a more modern, matte black version. But, perhaps the biggest impact came from removing the faux wood blinds and installing sleek, black double curtain rods.
This is one of my favorite ways to transform a space and I have done it in almost every rental. Just hang on to the blinds and put them back up before you move out!
My Favorite Affordable Supplies
Total cost: $131.9
I almost always install double rods in bedrooms. On the rod closest to the window, I hang light-filtering linen drapes for privacy. On the second rod, I hang curtains that will block the light, often in a color or texture to complement other textiles in the room. I love using IKEA’s system, but you can get supplies at Amazon, Target, Michaels etc. For me, these IKEA products are tried and true and never fail. Plus, the products are affordable. Everything you need for this look is $131.9, whereas custom drapes will cost you hundreds of dollars!
You’ll also need a drill or screw driver, screws (and possibly anchors), measuring tape, a pencil and a level.
Installing the Rods
First, you install the Betydlig brackets. These are incredibly easy and forgiving to install since you can move them vertically after drilling in your screws (and anchors if you don’t screw into a stud).
The trick when installing your brackets is to place them close to the ceiling (I aimed for about 1.5 inches below) and wider than your window. That way, when the curtains are open you aren’t blocking the view or natural light. It creates an illusion of a bigger window and larger room.
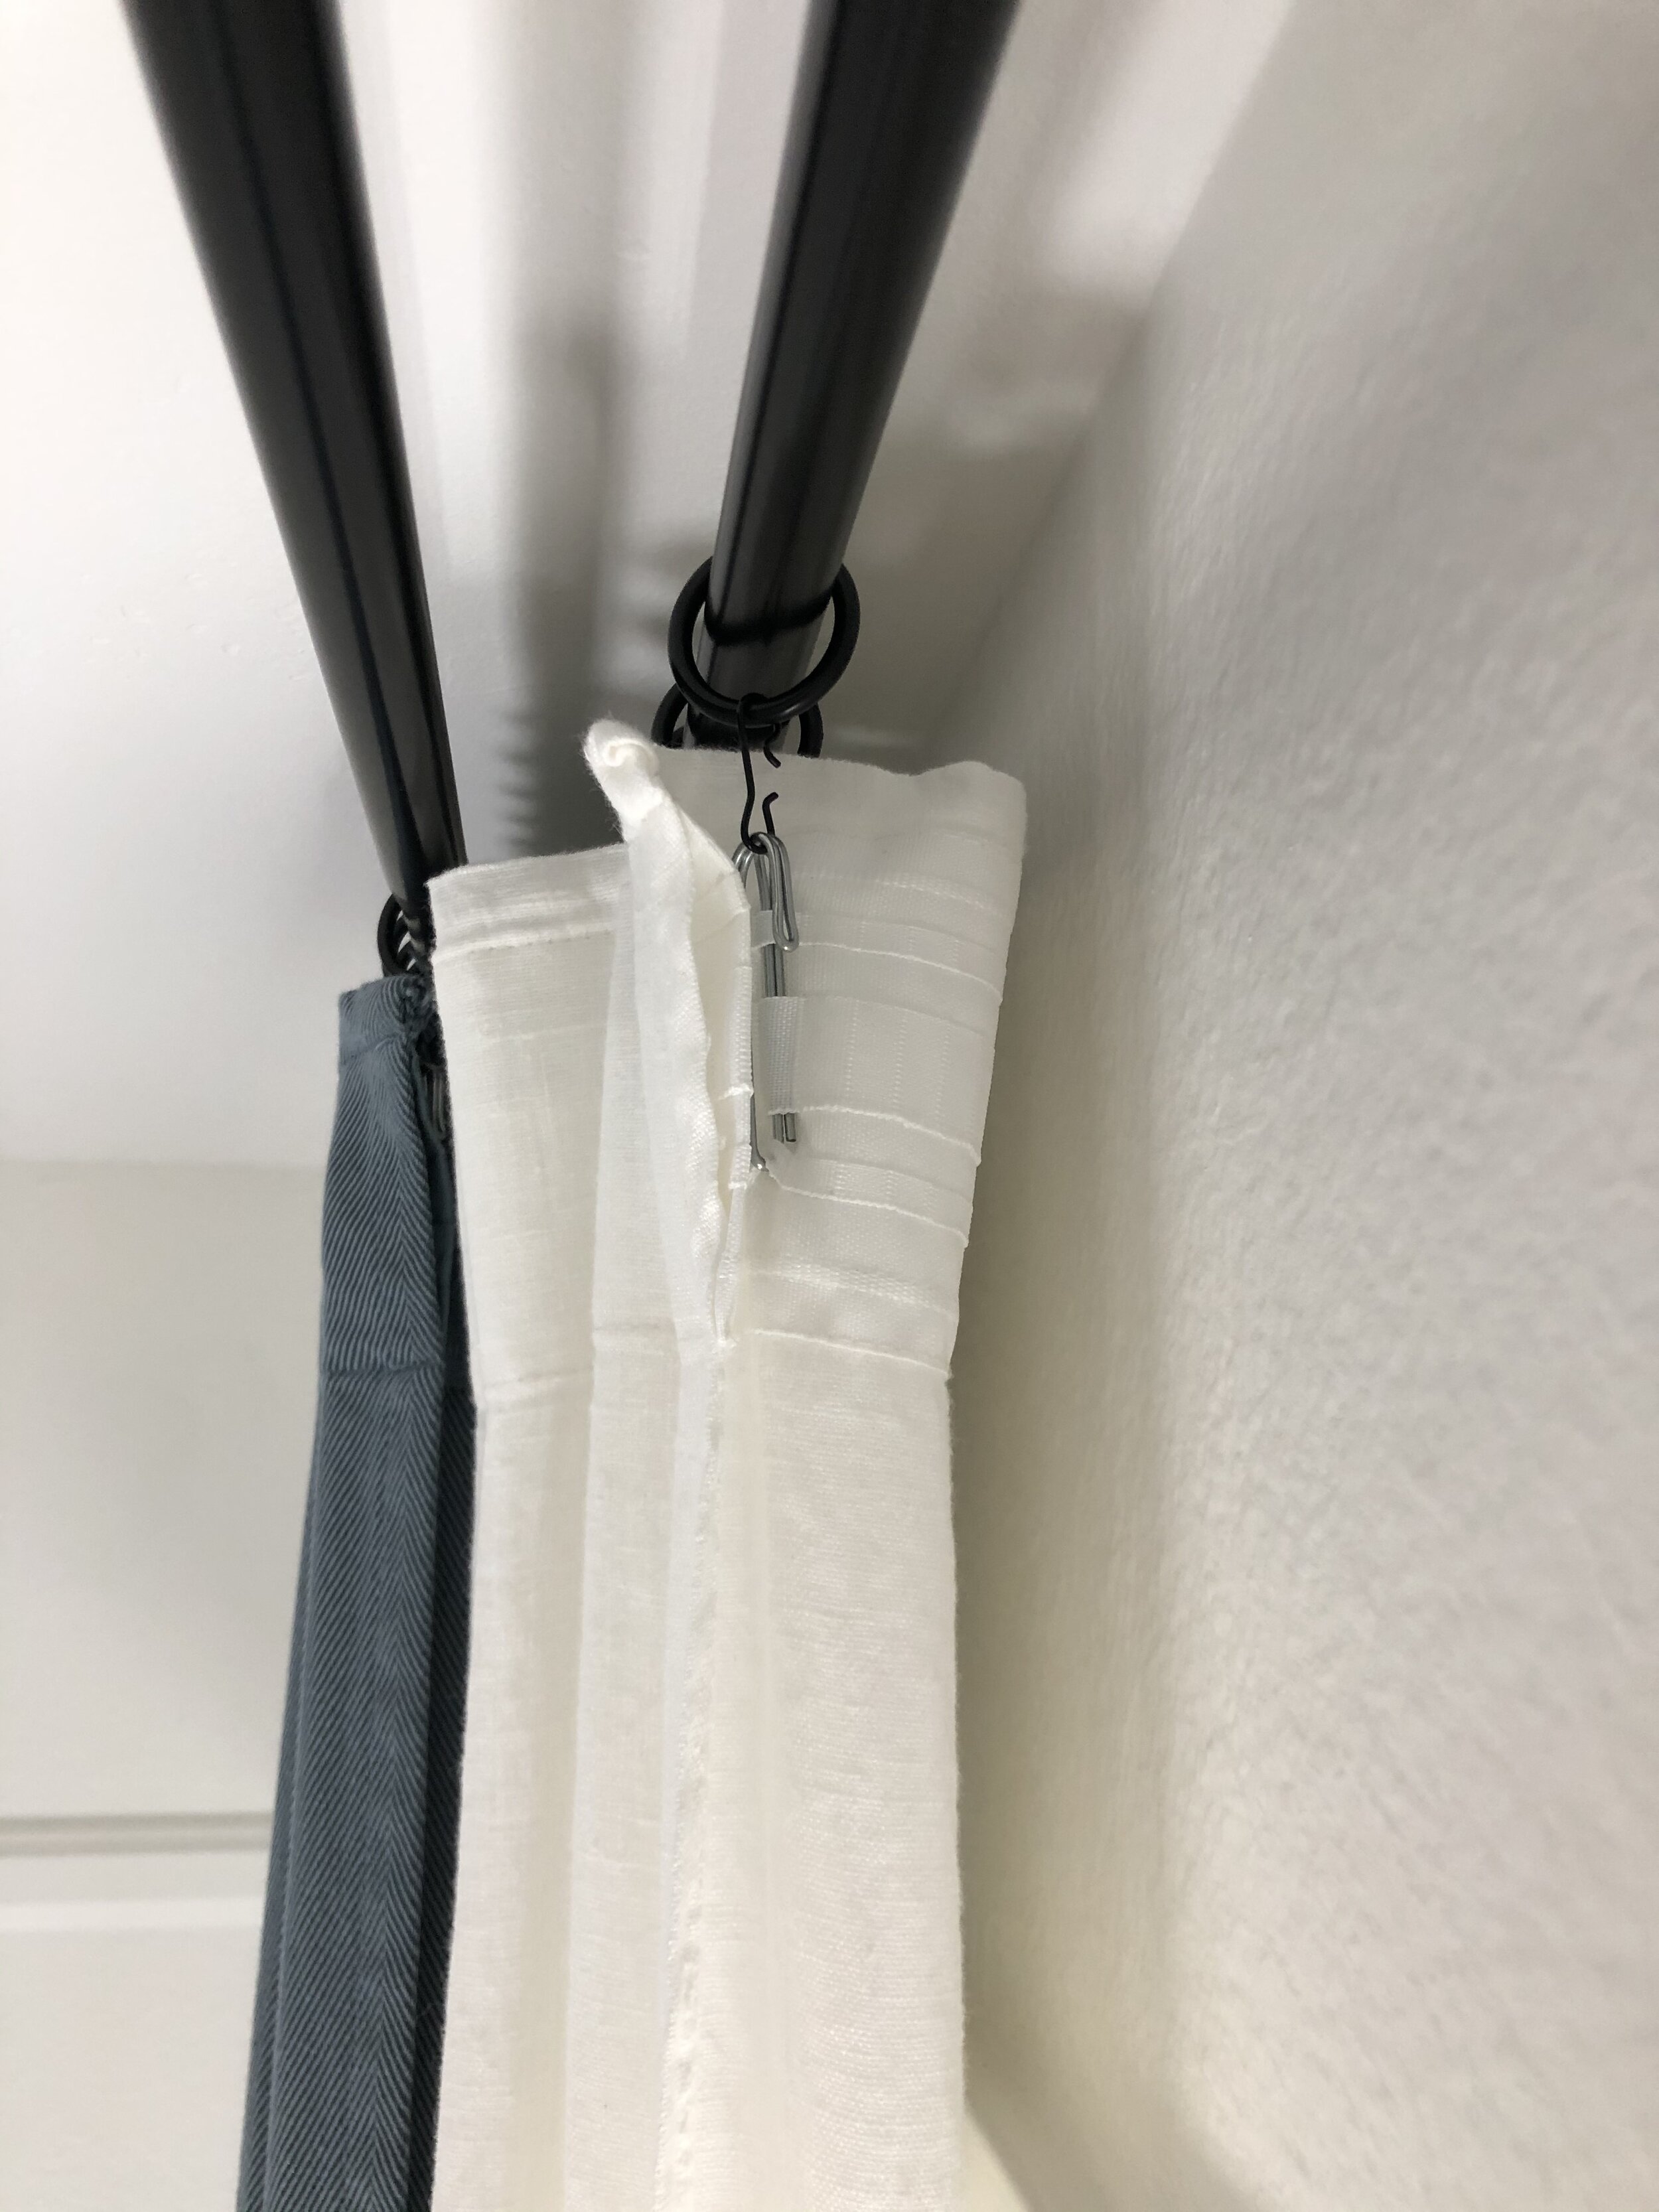
Slide the cover over the brackets and insert the curtain rod holders, two on each bracket. Then install your two rods.


Hemming the Curtains
IKEA’s curtains are long – 98 inches. If your ceilings are not that high, I recommend washing and drying to shrink them a bit. Then, you can use the Sy iron-on hemming tape to hem them to the perfect length. For us, washing and drying shrunk them enough to create a small puddle on the floor, which is exactly the look I was going for.
Hanging the Curtains

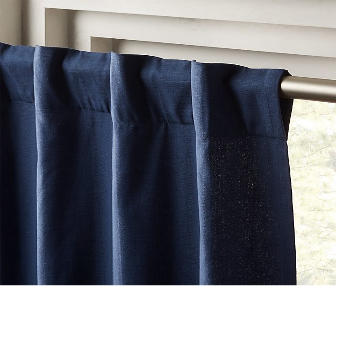
Now, the most important part – hanging your curtains. Many ready-made curtains come with grommets, or, with space to simply slide them onto your rod. These are perfectly fine and less time-consuming to install. However, most IKEA curtains have a band that allows you to pleat them using the Syrlig curtain rings and hang them with the Riktig curtain hooks.
Simply take the Syrlig hook and insert it on each side, counting the number of spaces to make it even. I counted two on each side here, but you could do three or more for a more dramatic pleat. After you have attached all the pleating hooks, simply hang them onto the curtain rings on your rods.


And that’s it!
Here’s a sneak peak of the guest bedroom. The full reveal, including a satisfying before and after, coming soon...